This is my complete guide for how to take a screenshot on windows 10 in 2021.
Taking a quick screenshot can come in really handy sometimes. It can save your time from copy pasting long notes or capturing that error message on your laptop. You can take a screenshot on windows 10 laptop or PC by the following methods.
There are several methods to take a screenshot on windows 10 laptop and PC.
- Print Screen
- Snip & Sketch
- Snipping tool
- Xbox Game bar
How to take a screenshot on Windows 10 using Print Screen key:
There are several different practices that can be used to capture a screenshot using Print Screen key alone.
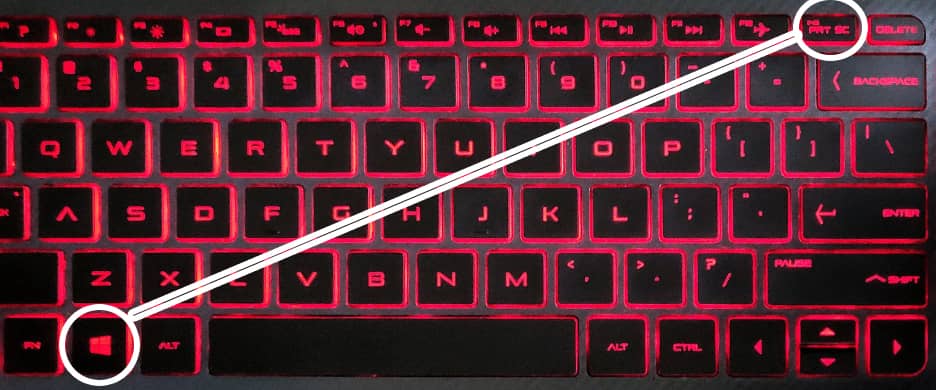
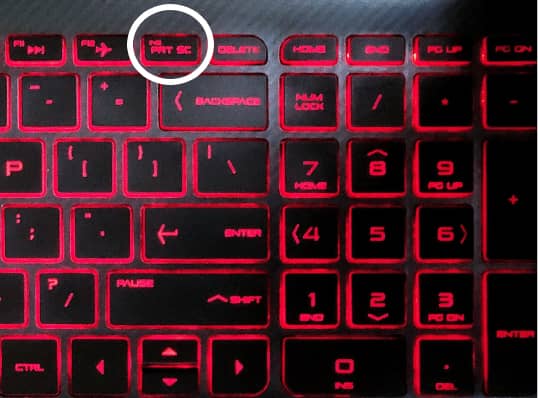
The Print screen key can be found at the end of Function(FN) keys or above the numeric keys in the top right corner.
To save the entire screen as screenshot press Windows key + Print Screen key. Once both the keys are pressed simultaneously the screen will be captured and saved as screenshot.
Where are screenshots saved windows 10:
Now, you could be wondering where are screenshots saved in windows 10. The captured snaps are stored in screenshots sub-folder inside pictures.
Folder Path : C:\Users\Your PC Name\Pictures\Screenshots
Annotate your screenshots before saving:
You can also annotate your captured snap before saving it. Open the file or web page which you want to capture as screenshot and press the print screen shortcut key.
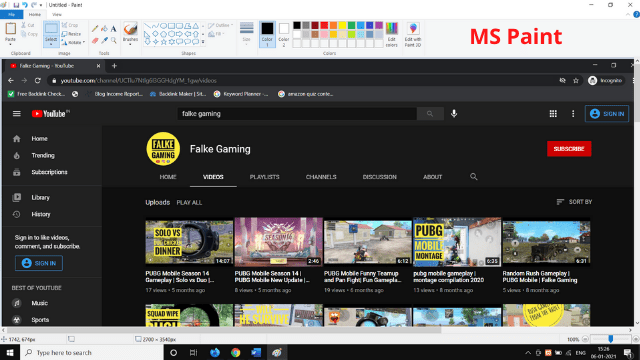
Once the above step is done open MS Paint and press Ctrl + V to paste your screenshot. Now you can annotate your screenshot in MS Paint and save it where ever you want in your windows laptop or PC.
Note: You can do this method either by pressing Print screen key alone or by using the Alt key + Print Screen key simultaneously.
If you still have doubts, you can refer the below screenshots.
Snip and Sketch:
Snip & Sketch is an inbuilt Microsoft windows utility which was released on October 2018. Before Snip & Sketch there was Snipping Tool which also exists till date.
How to take a screenshot on a laptop using Snip and Sketch:
Snip and sketch Microsoft app can be accessed in two ways one by going to start and searching with the keyword snip & sketch or by using the shortcut key Windows + Shift + S.
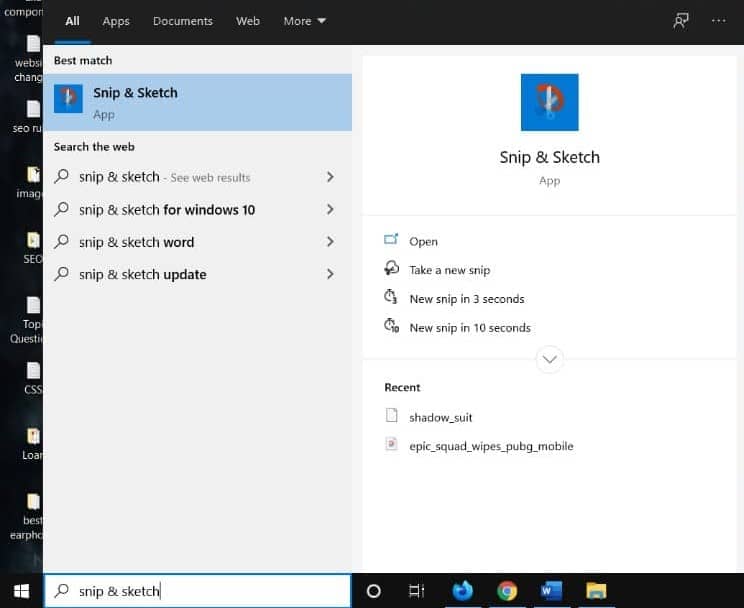
Users can capture a screenshot and edit it in the Snip & Sketch Microsoft app before saving. The app consists some useful tools by default such as touch writing, pen tool, pencil tool, highlighter, eraser, ruler and image crop tool.
It also features a timer option with 3 seconds and 10 seconds delay. The users can use these two options to delay the opening of snip & sketch bar. Once the editing process is done screenshot can be saved by using the shortcut key Ctrl + S or by clicking the save icon on the top right corner.
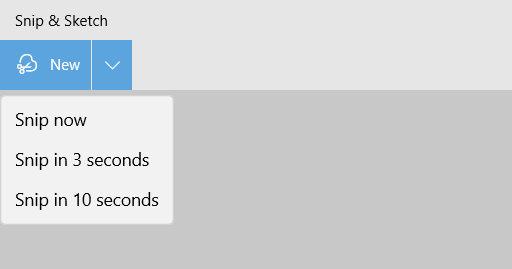
There are four different modes for snipping available in Snip & Sketch.
- Rectangular snip
- Freeform snip
- Window snip
- Fullscreen snip
Rectangular Snip:
The Rectangular snip mode allows users to take a screenshot by clicking and dragging the mouse over a selected area as per their wish. This option will be helpful for users to capture what they need and omit other unwanted text or images.
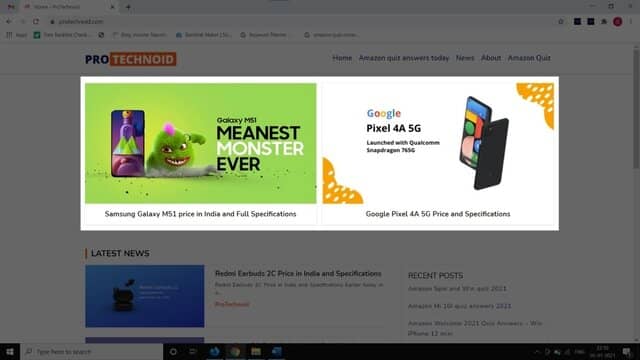
Freeform Snip:
The freeform snip mode allows you to take a screenshot by drawing over the area you need. The images captured using freeform snip will be saved in irregular shapes.

Window Snip:
Window snip option allows the users to capture the active open window or the entire screen if they wish to with just a click of a button.
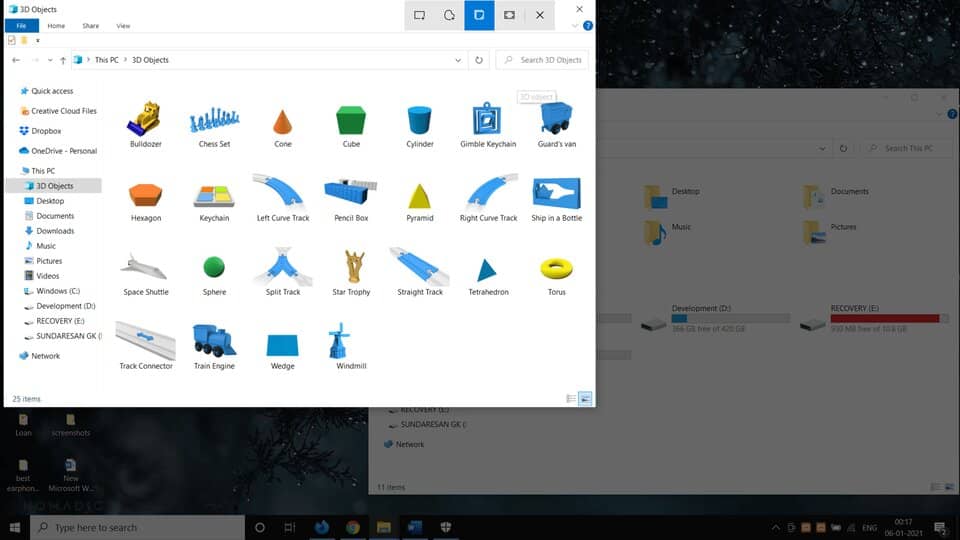
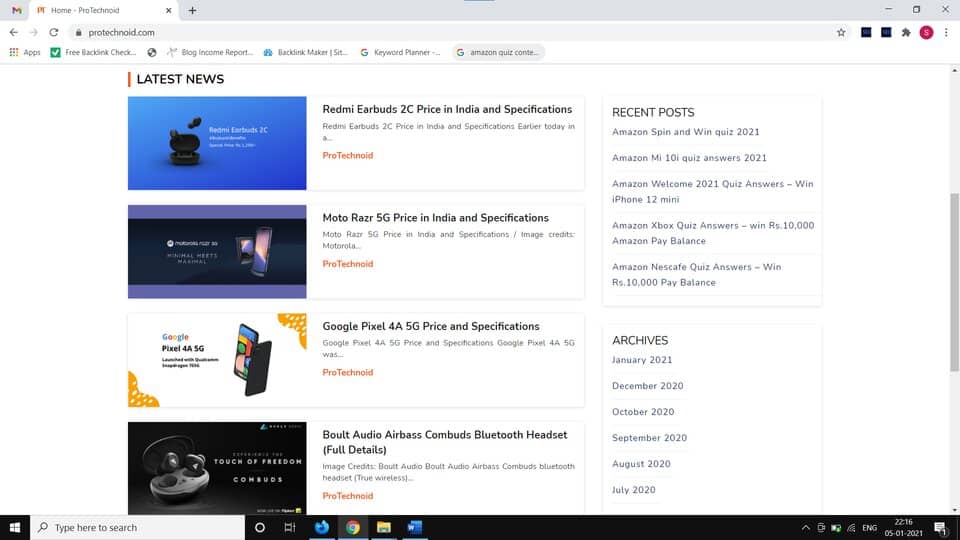
In the above image there are two windows. Now on which ever window i place my cursor will be considered as an active window (in this case the left window) & that window will be captured as screenshot and can be opened in the Snip & sketch app from notifications to edit and save to your computer.
Fullscreen Snip:
Fullscreen snip is same like a normal screenshot. It captures the entire screen as it is.
How to enable print screen in windows 10:
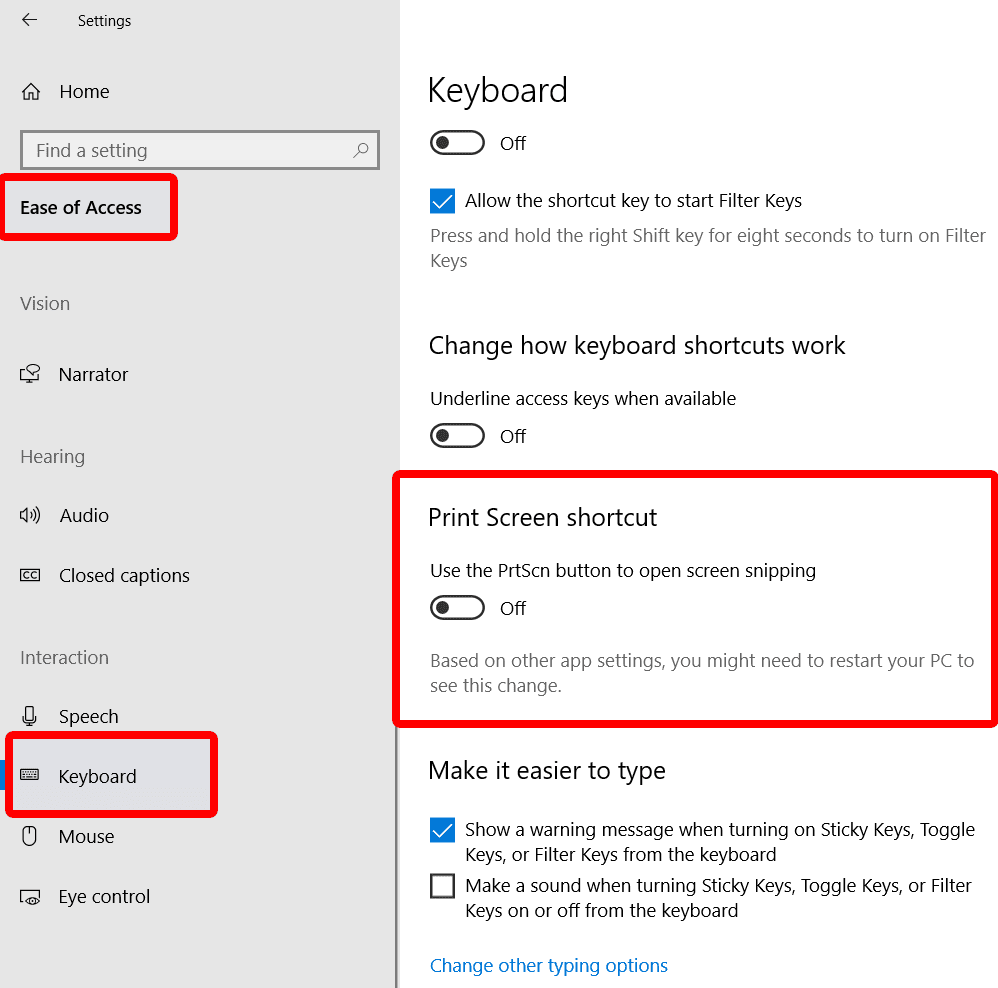
Users can even launch snip & sketch directly by just clicking the print screen key but for that to happen the print screen key should be enabled first.
To enable print screen in windows 10, go to ease of access in your system settings and select the keyboard menu to get the print screen enabling option like in the below image.
Go to -> Start menu -> Settings -> Ease of access -> Keyboard
How to take a screenshot using Snipping Tool windows 10:
Snipping tool is the predecessor of snip & sketch Microsoft app. Snipping tool also has the same four options which we saw in Snip & Sketch app. The only main difference between the two apps on functionality wise is the delay timer. The snipping tool can be accessed by searching Snipping tool in start menu.
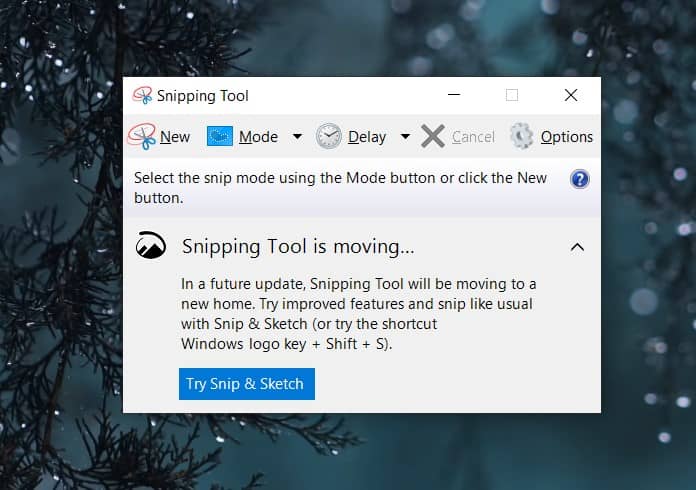
The snipping tool has a delay timer with options from 1 – 5 seconds difference but the snip & Sketch tool has only two options either 3 seconds or 10 seconds time frame.
Important Shortcuts for snipping tool
- Create a new snip ( Alt + N )
- Delay Capture ( Alt + D )
- Copy snip to clipboard ( Ctrl + C )
- Save Snip ( Ctrl + S )
Note: The above shortcut keys will work only when the snipping tool is open.
How to take a screenshot using Xbox Game Bar:
The Xbox console Game bar provides users two different options one to capture a screenshot of current active screen and another option to record it as a video.
Users can access the Xbox Game Bar either by searching in start menu or by using the shortcut Windows key + G.
Once the game bar is visible click on the camera icon to access the screen capture options.
The capture toolbox comes with few useful options.
- Screenshot ( Windows + Alt + Prtscrn )
- Record last 30 seconds ( Windows + Alt + G )
- Start video recording ( Windows + Alt + R )
- Turn mic on while recording ( Windows + Alt + M )
- Show all captures ( Opens Save folder )
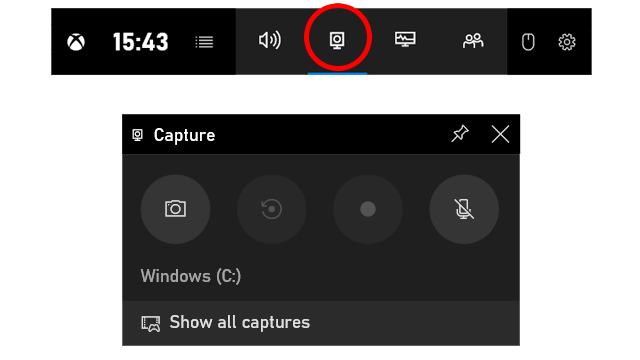
The saved screenshots and video recordings can be accessed by clicking on the show all captures option in the bottom of toolbox.
Folder path : C:\Users\Your PC Name\Videos\Captures
How to change Bluetooth name in windows 10
How to pause Windows 10 update

